Installation
Tools requirement
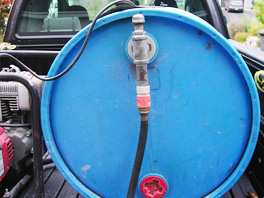
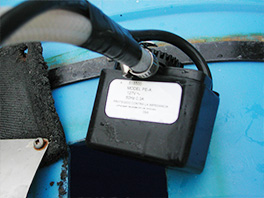
List of needed tools for installation- 40 gallons (150 liters) water tank, hose, hose connections and submersible pump 0.8 gallon per minute
- 35 feet drill feeding water hose, quick plug fittings and power cord
- 3 KW power generator or inverter
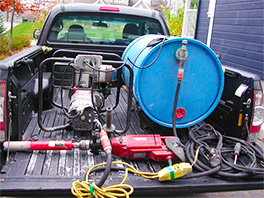
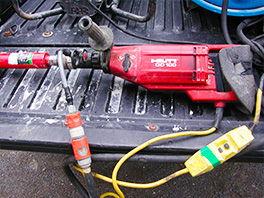
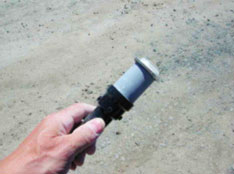
- Diamond or percussion drill with a 2 inches (52 mm) diameter core bit
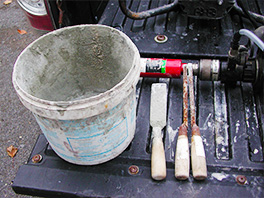
- 1–1/2 and 1/2 inch wide concrete trowels and sponges
- Grout mixing bucket
- Small tools ( hammer, & metal chisel)
- Installation level tool
If needed, we can sell you directly some of the equipment or forward you to some suppliers.
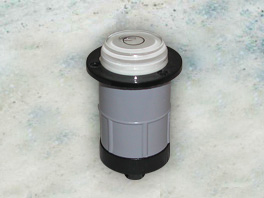
Water drum including pump and fittings to connect to a diamond drill
Feeding hose with quick plug fittings and power wire
Installation level
Note: Water drum will not come with metal holding brackets
Traffic signs are required in order to provide for the safe and orderly movement of motorized and non-motorized traffic and pedestrians.
Important:
We strongly recommend that installation is performed using fast setting grout. Use of fast setting epoxy could be performed only if the epoxy is acetone free.
Our installation experience is based using a Hilti DD150 or DD100 with diamond core bit. On this tool, you can select 3 different rotation speeds. For best drilling results, we suggest to select the 2400 rpm speed.
Installation curbs & paving blocks

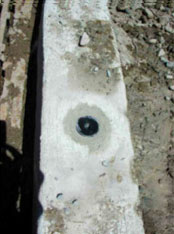
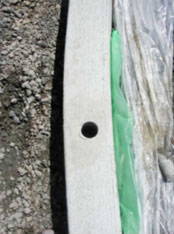 Using a diamond or percussion drill with a 52 mm diameter core bit, drill a 12,5 cm deep hole in the center of the curb. Afterward, with the help of a hammer and a steel chisel, break the core and remove it using trowels.
Extract the water left in the hole and prepare a small quantity of grout. Fill the hole with grout up to 2,5cm from the edge of the hole.
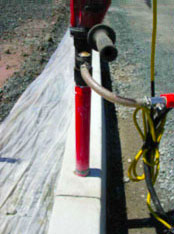
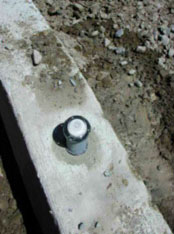 Then, place the level on the anchoring base and push it into the grout while levelling it at the same time.
Make sure it does not exceed the surface of the curb or sidewalk. Wait a few seconds and remove the exceeding grout left around the base.
The procedure with interlocking pavements is quite similar to curb installation. Installation in paving blocks require to drill a hole at the crossing intersection of blocks or in between two blocks in order to minimize the risk of block splitting. Using a 52 mm diameter bit, drill your hole in the paving blocks. When completed, remove the parts from inside the bit and complete the work by taking off the supporting material underneath the blocks to reach a depth of 12,5 cm. Then, prepare some grout and proceed the same way as indicated for curb installation. Wait at least fifteen minutes before cleaning dirt off the surface.
Important:
Drilling in granit curbs will require 3 times longer than conventional concrete curbs.
Ground installation
As for ground installation, remove a 4 inches diameter grass patch where the ground anchoring base will be located. Using a percussion tool with a one inch auger bit, drill a 12 to 16 inches deep hole in the ground. When completed, screw the ground base onto the anchoring steel rod and then insert the rod in the hole. Set your tool on percussion mode only and replace the auger bit with a metal rod to drive the anchoring rod and base down to a height of approximately 2 inches above ground. Then, place a bull's eye level on the base to make sure it's straight. Using your foot, hold it in place and finish driving it in the ground. When done, screw the summer plug or the stem into place.
Video installation clips